Mixed Drink

I’m not one for a mixed drink. I have a few issues with them, mostly the alcohol content tends to be high and I’m a lightweight when it comes to drinking. I like my wine and know how much I can have without issue. Mixed drinks can sneak up on you, especially if made really well.

So Bob and I went out to dinner in St. Pete the other weekend just to get out. We needed something a bit different and that worked. While out at dinner, Bob had a drink that was surprisingly good. So good we decided we needed to figure out how to make it at home.wp-image-883924789jpg.jpg 
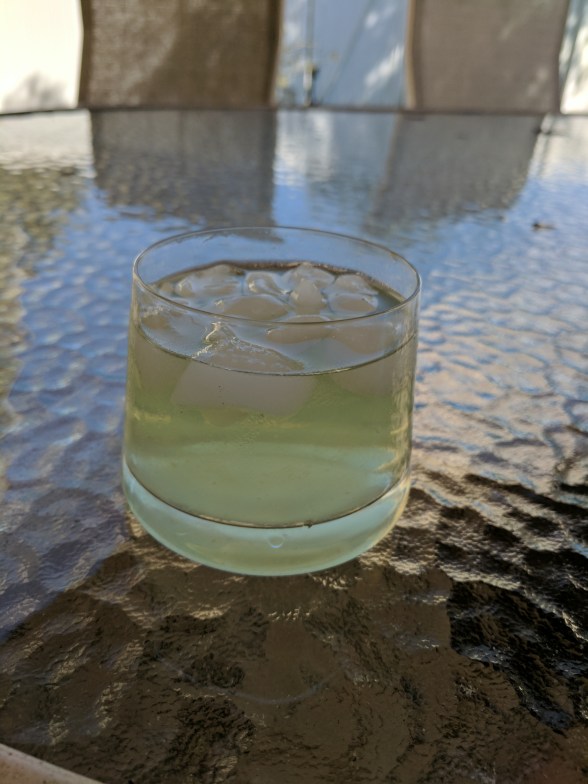
We didn’t have any of the liqueurs at home, so the next time we went out looking for beer for Bob, we picked up the three that we needed. I’m a big fan of St. Germain, so this was not the hardest decision to make.

The question became – the ratios. Exactly how much of each should we use. I decided to try a basic 2-1-1 as a starter and surprisingly it worked.

So – our at home Menage a Trois or a French Twist as I like to call it.

  • 2 tablespoons orange vodka
  • 1 tablespoon St. Germain (or other elderflower liquor)
  • 1 tablespoon Chartreuse (green is what our store had, and it gave it the correct color, so I would not necessarily look for the white)

Pour ice into a shaker and add the three liquors. Shake really well and strain into a small glass over new ice. Sip and enjoy.

This is a sipping drink and not one that can be quickly consumed. I didn’t end up finishing mine as it was a little strong, but it is a nice change for a warm afternoon.


Sweet potato fajitas

The other day I thought about making sweet potato chili, then decided that I didn’t want to make that. I wasn’t sure what I wanted to make, so I scoured the fridge and decided on sweet potato fajitas.

Usually I plan out meals very carefully. I buy only what I need for specific meals, and I try to make every one of those so food does not go to waste. Most of the time, I’m successful in this, but sometimes, I just really change my mind half way through the week. This was one of those times.

So  had limited ingredients on hand and no desire to go to the grocery. I made do with what I had, and cut and roasted the sweet potato while I fried up the onion and yellow pepper. I used a mix of chili powder and cumin as the main seasoning with some lime on the aromatics after they were done cooking. In the end, I thought the whole thing came together ok, but it needed a kick. I think adding some chili garlic sauce to the onions might help. Bob went with hot sauce and said it was just fine.

Sweet Potato Fajitas

  • 1 medium sweet potato, diced
  • 1/2 large sweet onion
  • 1/2 yellow bell pepper
  • flour tortillas
  • cheese mix (whatever you have on hand)
  • 1 tablespoon chili powder
  • 1/2 teaspoon ground cumin
  • 1/2 lime
  • olive or other neutral oil
  • salt and pepper to taste

Preheat oven to 400 degrees F.

Wash and dice the sweet potato. I like small dice as it cooks faster, but larger is ok too. Slice onion and pepper thin. (If you are not crazy about peppers, peel the skin off of them – it helps with the strong taste.)

Toss potato with spices – chili powder, cumin, salt and pepper – and oil to coat. Roast for about 20 minutes in 400 degree oven. Careful – depending on how small they are diced, this may take as few as 15 and and many as 30 minutes. You want the potatoes soft, but not mushy.

While the potatoes roast, heat a little olive oil in a pan and add the onion and pepper when hot. Season with salt and pepper and cook, stirring frequently, for about ten minutes. When the vegetables are softened, but still retain a crunch, remove from heat and season with some more salt and pepper. Squeeze 1/2 lime over the vegetables and mix. When the potatoes are done roasting, add to the pan and toss to combine.

Split mixture over 6 flour tortillas and top with grated cheese of your choice.


I’m not sure what to call this except good

It has been a while since I posted anything food related. Ok, it has been a while since I posted anything (as I am writing this on the same evening that I posted the last post). Between work, school and getting sick (hazard of working with kids) the month of January passed me by. But … I have a sandwich.

Bob and I tried a new French Cafe near us last month. This cafe has been in Sarasota for years, but only recently opened a second place closer to us. We decided to stop in one day for lunch and I had the most amazing sandwich that I decided I needed to recreate at home.

This is based on the sandwich I had at the cafe, but there are plenty of differences. I don’t have a good French baguette at home, but my grocery does incredible ciabatta bread. I like pesto, but I find kale pesto much better – something about the added peppery taste. I also have no idea how they actually made the sandwich, but I think I got the basic concept.

Roasted eggplant and tomato coated in balsamic and a little olive oil. Roasted red peppers, kale pesto and a pecorino cheese. This.  This makes a perfect sandwich.

It’s not fancy and it won’t win any awards, but I could eat this for lunch as often as I eat a tomato mozzarella sandwich. For the record, that is really often.

Brownies

I have a new favorite brownie. David Lebovitz is pretty much a genius when it comes to desserts and I really love his other brownies, but I have to admit, these are better. These are great. These are better than any brownie I’ve ever eaten, with the possible exception of the brownie I had in Belgium. I can’t say for certain that the Belgium brownie was better, but I do know the creme anglaise was pure perfection.

But I digress. These. These brownie. Really, I can’t say anything else. I followed the recipe (amazingly) except for the salt on top and I used caramel I had on hand and didn’t make any special for these. Try them. Make them. Delight in the perfection of a rich, sweet, chocolatey brownie with a little caramel cheesecake texture in the swirl.

And just because I was home for a few weeks and had time to spend with them … the pets.

Steam Buns

Even with a little time off I can’t seem to get it together enough to update the blog before Christmas. Oh well, these things.

While I generally don’t eat meat these days, I haven’t given it up entirely because I’m a fussy eater and I like options. This means that every now and then, Bob gets a meat dish at home because I really want to try to make something. This week that was steam buns. My Asian market didn’t have the buns when I went to look for them. I looked in every section, on every shelf, in the freezer section, in the chilled shelves, etc. Nothing. No steam buns. None of those delicate pockets of goodness waiting to be filled. I did find steam bun flour, so I picked up that and decided to try my hand at making my own. img_2248

The package directions were … unusual to say the least and not entirely written in English. To combat this, I also scoured the web to see if I could find a good set of directions for making steam buns and found one recipe that looked easy enough to follow. I didn’t follow either the package directions (such that I could make them out) or the BBC recipe exactly, but sort of combined them to come up with a dough that looked right.

Complicating my desire to make steam buns at home – I don’t own a steamer. I thought about baking them, I thought about trying to steam them in the oven, but in the end I came up with a method to steam them that actually worked. It’s my soup pot (or pasta pot or whatever – my large pot) with a thing I use to cook vegetables on the grill and a large glass lid. Much to my surprise, this actually worked!

For the filling, I went traditional – kind of. I had made pulled pork a while back when we had Mom and Dad over for lunch, and I still had half of that in the freezer. I went with a basic hoisin/soy sauce combination for the meat and did a quick pickle on some vegetables – red onion, carrots and cucumber. Quick pickle the vegetables, heat the pork with the sauce and add to the home made steam buns.

The verdict? The buns themselves were really close to the package ones, but definitely not as pretty. I also need to alter the recipe a little, such as using water instead of soy milk, and I may try the regular flour with yeast version. For the filling, I liked the sauce, but I need a little less meat for the amount of sauce I made (I used half of the pork I had in the freezer). So, it tasted good, but I wanted more sauce. It is all about the sauce. The quick picked vegetables were perfect – crisp, tangy and really well balanced with the buns and the meat. This was a really good first attempt, but something that I do need to alter, just a little, to get exactly right.

You can tell which are mine and which are Bob’s by the ratio of pork to vegetables in these. I have a little pork with a lot of vegetables while he has more pork and fewer vegetables. I’m thinking of using some of the leftover General Tso’s tofu that I made Christmas night (yes, we had homemade Chinese for Christmas dinner) as my filling for lunch today and leave Bob with the pork.

I am going to wait to post the steam bun recipe itself until I can perfect it, but the sauce is pretty simple:

  • 1/4 cup hoisin sauce
  • 2 tablespoons rice wine vinegar
  • 1 1/2 tablespoons dark soy sauce

Mix well.

For the quick picked vegetables I used:

  • 1 tablespoon mild vinegar (rice wine vinegar or apple cider vinegar)
  • 1/2 teaspoon sugar
  • pinch of salt

Mix well until sugar and salt are fairly well dissolved. Add vegetables (I did these as separate) and mix to coat. Chill for about ten to fifteen minutes.


Sweet Potato Chili

Bob told me I can’t call this chili, but I disagree. He claims chili is more liquid-y and doesn’t have as many chunks in it. I understand where he is coming from, Texas style chili is almost all meat, cooked down to a very thick soup and spiced. But I grew up with a different kind of chili, one where meat, beans and peppers all played a big role in the texture and flavor. I know, there is a lot of debate about chili and what it technically is, but I’m calling this chili in large part because the recipe it is based off called it chili.

We had a cold front come through, complete with a very cold rain that felt a little like icicles falling on your skin. This didn’t last, but it did get me in the mood for winter type food, and chili is definitely a winter food. I thought about making Bob super happy and making a traditional meat chili, but that would not make me very happy (and he is already getting hosing pork buns as soon as I manage to make it to the Asian market). I found a Jamie Oliver recipe for sweet potato chili and thought it looked interesting – minus some of the seasoning, the black beans and flour tortillas for the chips. But receipts are a suggestions, a starting point, so that is what I did.

I started with the basics of his version and changed a few things. Rather than use a dried or fresh chili and garlic, I went with chili garlic sauce. I really dislike blackens, so I substituted pinto beans. I like cheese on my chili, so I added that. Corn tortillas made great chips, so I swapped them for the four ones he recommends. I didn’t have smoked paprika on hand so I used regular paprika and two drops of liquid smoke. It worked. I really loved this chili. It may become my new go-to chili. And maybe, since I love this one so much, I’ll make Bob a meat chili so he can have his own.

Recipe:

  • 2 scallions
  • 1 tablespoon chili garlic sauce
  • 1/2 pepper – orange, yellow or red
  • 1 sweet potato (small to medium)
  • 1 teaspoon chili powder
  • 1/2 teaspoon paprika
  • 2 drops liquid smoke
  • 1/2 teaspoon ground cumin seed
  • 3/4 cup diced tomatoes
  • 3/4 cup vegetable broth
  • 1, 7.75 oz can pinto beans, drained
  • 2 tablespoons plain greek yogurt
  • 1/2 lime
  • 2 corn tortillas
  • 1 teaspoon chopped cilantro
  • shredded cheese mix
  • salt and pepper
  • olive oil
  • rice for service

cook rice per package directions

Heat over to 350. Roll tortillas into a log shape and slice to create threads. toss with a little bit of oil and salt and bake for about 8 minutes – you want them crispy but not burnt.

Slice scallions, separating white/light green parts from dark green parts. Dice the pepper and grate the sweet potato.

Heat 1/2 teaspoon oil in a pan. When hot, add white/light green scallions, paprika, chili powder, cumin seed, chili garlic sauce and liquid smoke.  Cook over medium high heat, stirring constantly, about two minutes.

Add pepper and sweet potato. Stir to combine with spices. Add tomatoes and broth and mix well. Season with salt and pepper then bring to a boil. Reduce heat to medium low/low and add beans. Mix and cover. let simmer 15-25 minutes.

Remove from heat. Add dark green scallions, yogurt and lime juice. Mix well.

Layer – rice, chili, chopped cilantro, tortilla strips and cheese. Serve hot.

*recipe adapted from Jamie Oliver’s Sweet Potato Chili. (I forget where I found it originally.)

And just because they are cute ….

Garden Quiche

After almost a decade in Florida I have finally had success with the garden. For the first time since I left Jersey, I have actual home grown vegetables that I can eat. It is so exciting to me that I got a little giddy. Yes, that tells you something about how exciting my life is that I get giddy about vegetables, but there you have it.

I really missed good tomatoes. The kind of tomatoes that actually have flavor. The ones that taste like sunshine – you know, Jersey tomatoes. These are not Jersey tomatoes, but they have actual taste, actual flavor and there are more on the vine! I didn’t get a ton from the first picking, but enough that I decided to make a quiche.

img_2193
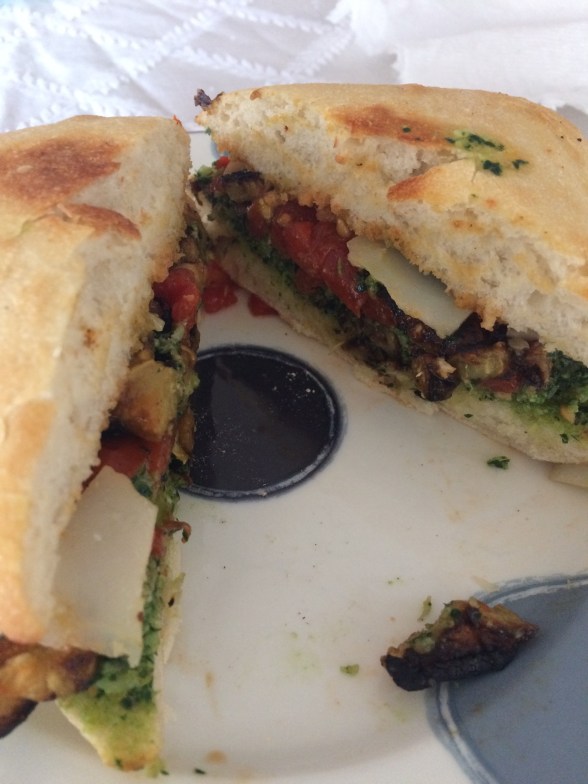
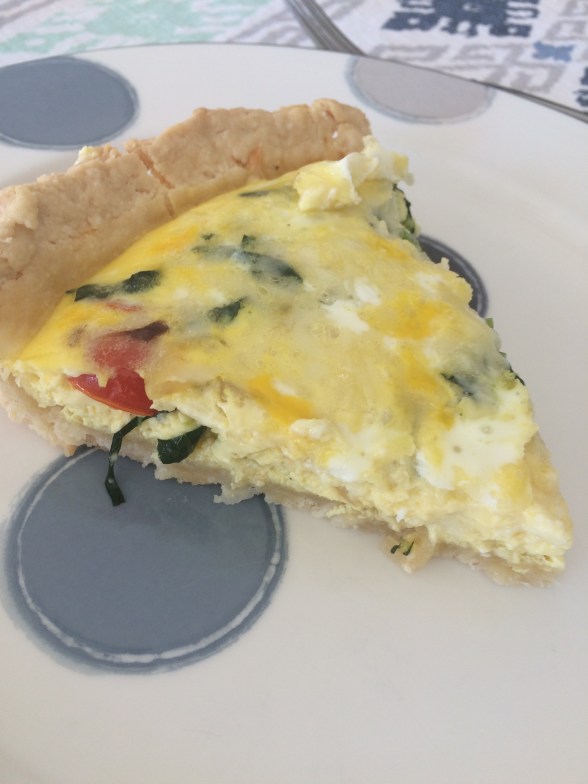
I was pretty excited to have enough vegetables to make stuff with and I decided that the kale and the tomatoes would make a great brunch dish. I picked all the vine ripe tomatoes I had (just a handful, but that was enough) and a few kale leaves and combined that with a small shallot to make the filling for the quiche.

I stuck with a basic recipe and didn’t try to do anything fancy with it. Soften and slightly caramelize the shallots in a little butter, add the kale and cook until bright green and wilted. Season with salt and pepper and add the tomatoes.

I started with my basic pie crust, par baked for ten minutes to prevent the dreaded “soggy bottom” that always gets contestants on the Great British Bake Off in trouble. (If you have no idea what I am talking about, go you-tube and search … warning, the show is addictive.) Once the crust was baked I added the vegetables to the crust, topped with some grated gruyere cheese and then added the egg/milk mixture and baked. The results were fantastic!

Bob and I had the same reaction – we wanted to find fault with this. We wanted it to need something like bacon (or eggplant bacon in my case) but it just didn’t. It had a really good depth of flavor, a good bit of egg taste, the sweetness from the cheese and the freshness of the vegetables. We both went back for seconds.

Recipe:

  • handful cherry tomatoes
  • handful of kale (maybe 2 ounces??)
  • 1 shallot
  • 1/2 cup grated gruyere cheese
  • 4 eggs
  • 150 ml milk
  • salt and pepper to taste
  • 1 pat butter
  • 1 pie crust
    • 1.5 cup flour
    • 1 stick salted butter
    • 3-5 tablespoons water

To make the crust, mix flour and half the water in a food processor with a dough blade. Mix and add butter, one pat at a time until incorporated. Turn out onto floured surface and form into ball, adding more water if needed. Roll out into large enough circle to cover pie plate, press into pie plate and place in freezer until over heats.

Heat over to 350 degrees. Once hot, par bake the pie crust, ten minutes. Be sure to fork the crust to prevent air pockets.

While crust cooks, thinly slice the shallot and kale, cut the tomatoes in half. Heat one pat of butter (1/2 tablespoon) in pan and once hot and melted, add the shallot. Cook stirring until soft and slightly browned – three to five minutes – over medium heat. Add the kale and cook, stirring until soft. Add salt and pepper to taste (add more than you think you need so you don’t need to add more to the egg mixture). Toss in tomatoes and mix together.

Spread the kale mixture into the crust, forming a relatively even layer. Top with 1/2 cup grated cheese. Mix 150 ml milk with 4 large eggs and beat to combine. Pour egg mixture over the cheese and kale mix and return to the over. Bake at 350 for about 40 minutes, covering after 25-30 to prevent the crust from burning. Check that the eggs are cooked by using the toothpick method. Remove from oven, let sit for a few minutes then slice and serve.

*recipe for the quiche adapted from Food.com basic quiche recipe.

Biscuit Pie

Sometimes I want to make something only to realize that I either can’t remember the recipe or I am missing something to make it. Sometimes that combination leads to to experiment and that experiment really works.

img_2138
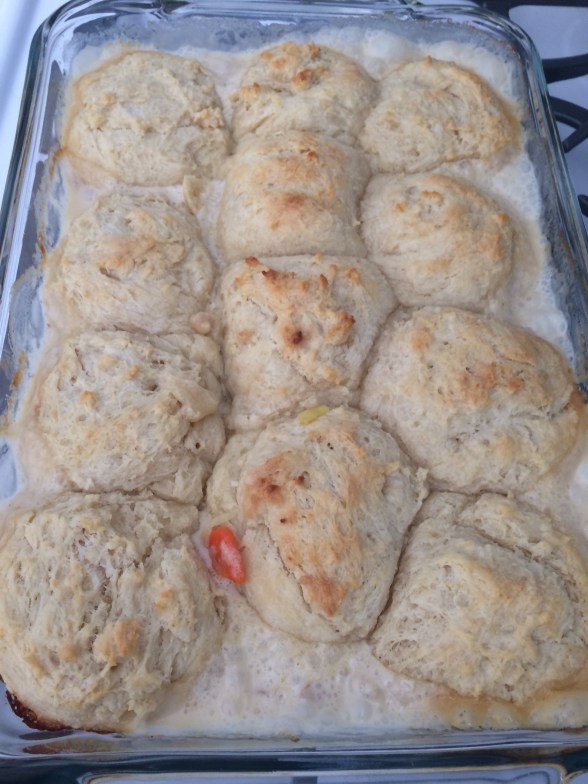
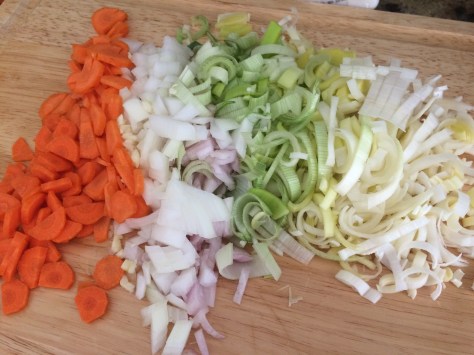
A few years back I became obsessed with savory pies, especially the chicken, ham and leek pie we had in England. I made a few versions of it and they always came out well, but not exactly the same. Since then I’ve reduced my meat intake considerably, to the point where I eat almost none. Every now and then, especially when the weather gets cooler, I kind of want the comfort food aspect that a lot of meat dishes can give. With that in mind, I decided to do a chicken, ham and leek pie again, but this time, I decided I wanted biscuits on it. Yes, biscuits.

img_2139I started this with a vegetarian base so I could split the filling and have a vegetarian version for later in the week. Leek, onion, shallot, garlic and carrot. Then I made the sauce because, as we all know, the sauce is the best part of any savory pie. A little wine, some heavy cream, vegetable stock and it became perfection. After splitting the filling, I dded the meat and topped with buttermilk biscuit dough (yes, homemade and darn delicious I must say).

img_2140
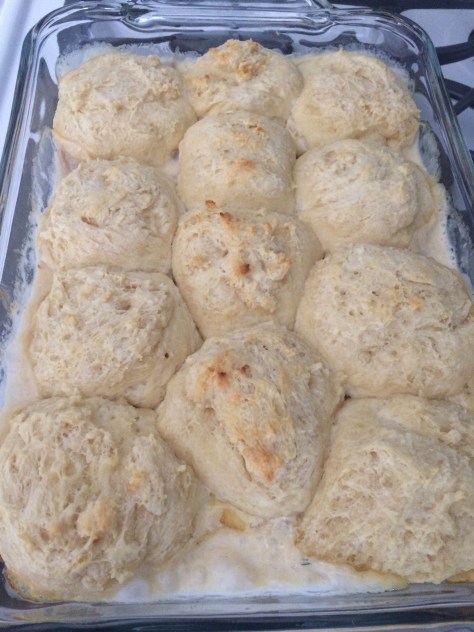
The results were pretty fantastic. Light and savory biscuits with the rich sauce and you have comfort food heaven. I’m actually super excited to cook up the vegetarian version this week as I think it will be just as good without the meat. Maybe better.

img_2143

Recipe:

  • 1 pat butter
  • 1 leek, white and light green parts
  • 1/4 sweet onion
  • 1 small shallot
  • 2 smallish cloves garlic
  • 2 medium carrots
  • 1/4 cup white wine (I used a moscato this go)
  • 1 cup heavy cream
  • 1 cup vegetable stock
  • 1 teaspoon flour
  • 1 tablespoon fresh thyme leaves
  • salt and pepper to taste
  • 1/2 chicken breast plus one chicken thigh
  • 4 oz. ham
  • buttermilk biscuits (I used this recipe from Girl versus dough – incredible and easy!)

To cook the chicken, heat pan over medium high heat. Add chicken breast and thigh and enough water to cover the bottom of the pan. Cover and cook until cooked through, about fifteen minutes. Remove from heat and leave covered for a few minutes then transfer to plate to cool. Shred chicken with two forks.

Dice ham.

Heat oven to 425 degrees

Chop leeks, onion, shallot and carrots into a small to medium dice. Mince garlic. Heat pan with 1 pat of butter (about a half a tablespoon) over medium heat and add vegetables and garlic. Sauté until softened and aromatic. Season with a little salt and pepper. Add thyme and cook for about one minute, stirring frequently. Add wine and stir. Let the wine evaporate a little then add 1 cup of cream. Add flour (or arrowroot or cornstarch for no gluten, but with the biscuits … just use flour) to vegetable stock, stir and add to vegetables. Increase heat to medium high. Allow to cook for a few minutes until bubbling, then reduce heat to medium and let thicken and slightly reduced. (This is where I split the filling, keeping half totally vegetarian and adding the meat to the other half). Add chicken and ham and stir to combine.

Pour filling into an 8×11 pan and top with biscuit dough. Place, uncovered, into the oven for 20-25 minutes until biscuits are cooked through (mine took 23 minutes). Remove from oven and let rest for about five minutes, then serve. I served mine with a kale salad and it was comfort food bliss.

Cranberry Curd Pie

I have a few days off and am caught up with school. Since this is a rare event, I decided to experiment in the kitchen a little and decided, as a nod to the holiday, to make a cranberry curd pie that I saw a recipe for. When I shared it with Val, she also got excited by it, but I ended up making it first. I didn’t follow the recipe exactly, but close enough that I will still say it is the NYT recipe.

I started with the basic ingredients – cranberries, oranges and sugar. Since I love clementines and they are now in season, I have a bag of the on the counter, so I used two for this recipe. I picked up some beautiful cranberries at the store and cooked the zest and juice of the clementines with the cranberries and some sugar to make the base of the curd. One review said to not cook them down much, but I was fussing with the pie crust and ended up cooking it a little long. It still worked. img_2133

I used the mesh sieve method and strained the juice to make a really smooth curd. Here is where things started to get tricky. It took a while to strain the cranberry mixture. Probably more time than the author of the recipe intended, so it was pretty much room temperature when I finished. This does not lend itself to incorporating butter into the curd, so I returned it to the stove and stirred in the butter, one pat at a time, over low heat. It worked. The butter didn’t melt, but it did incorporate into the curd just fine. I took it off the heat, stirred a little more then added the eggs. The whole thing went into an oil based crust that I made (decided to skip the rice flour crust as I couldn’t find hazelnuts anyway) and then I baked it – slightly longer than there recipe said, but it wasn’t setting so an extra three minutes were in order. I made some whipped cream (new secret for whipped cream – use powdered sugar instead of regular granulated sugar. Super smooth and it helps stabilize the peaks) for the top and that was that. My arm hurt after the straining part, but still easier than the French Silk pie. img_2135

The results were delicious and I don’t say something I made was really good often. I usually find fault with it, but I can’t really find fault with this pie. Yes, it was suppose to be a tart, but I don’t have a tart pan. Yes, it should have a different crust, but this one worked out fine. Yes, it could have been a little fuller, but it didn’t need to be fuller. With this pie you get the tart of the cranberry, an undertone of lemon (without any lemon in the pie) and a clean flavor that is really nice after a meal. This probably won’t replace cranberry sauce at the holiday table, but it should. It really should.

On the pet front … Tigger, Leia and Arthas are all doing well. Arthas is up to two miles for his morning walk, and he is starting to ask to go for walks. He doesn’t bounce around like Jessie did, but he goes to the front door or to where my shoes are and he gets a little excited when he hears his leash. He is getting better with the cats, and they with him. We had a point of contention recently where Leia was on the couch when he wanted to go to sleep, but other than that, they are wonderful. I stopped by the shelter to donate some food I had gotten for Gracie (the other two won’t eat it) and they were super happy to see how well he is doing. As one volunteer put it, he just needed a chance to be a dog.

They really are good babies. I still miss Jessie and Gracie and Gracie’s loss is still really raw, but we are getting there. Tigger has become very affectionate recently and Leia continues to be the puppy cat she is – greeting us at the door, laying on laps etc.

Recipe Cranberry Curd Pie:

  • 12 oz. cranberries
  • 1 cup sugar
  • juice and zest of one orange (or two clementines)
  • 1 stick (4 oz) butter, room temperature
  • 2 eggs plus 2 egg yolks

Use your favorite pie crust – it will be fine. I pre-baked mine for ten minutes, just to set it.

Combine the cranberries, sugar and orange (zest and juice) into a sauce pan and cook on medium heat until cranberries pop and begin to break down. Stir often to prevent sugar from burning.

Preheat oven to 350 if not already heated from the pie crust.

Once cooked down, strain the mixture through a sieve or use a blender/immersion blender, to puree. If not warm after straining, return to heat for a few minutes, stirring frequently, then add butter, one tablespoon at a time, until fully incorporated. If mixture is hot, temper the cranberry mixture into the eggs then add eggs into cranberry curd and stir well to combine. (I didn’t temper here because the cranberries were fairly cool at this stage) Pour into pie crust and bake at 350 degrees for ten plus minutes to set. I cooked mine for thirteen minutes until the outer curd was set, then let it cool on the stove to set the rest of the curd.

Whipped Cream:

  • 1 cup heavy cream
  • 1 teaspoon vanilla extract
  • 1 tablespoon (heaping) powdered sugar

Mix cream and vanilla together and beat with mixer on medium to high speed until soft peaks form. Add powdered sugar and continue mixing until stiff peaks form. Cover and chill until ready to serve.