My Cursed Socks

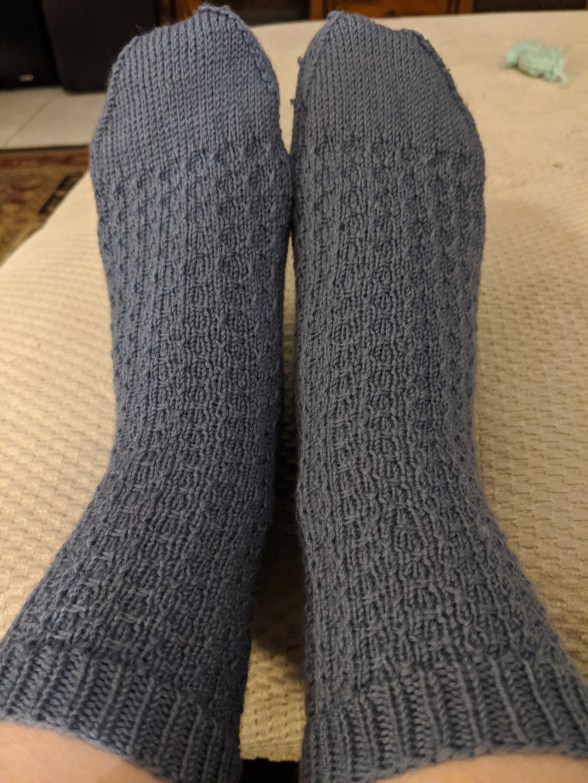
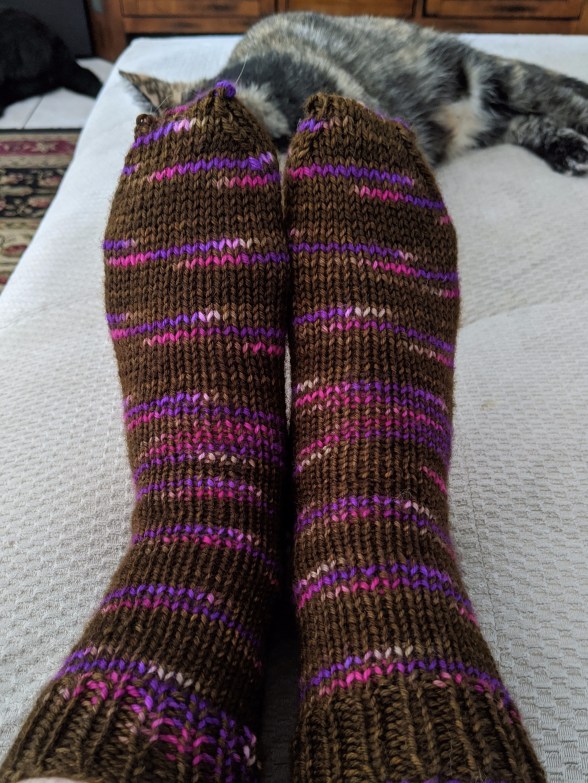
Don’t get me wrong, I love these socks and intend to wear them frequently once it gets cool again, but I really felt like they were cursed as I made them.

Usually I can make a pair of socks in about two weeks. This takes into account working and the limited hours to actually knit during the week, and long knitting sessions on the weekends to make up for it. I really enjoy knitting socks and seeing them come together, but man is it frustrating when things go wrong.

I started these socks in January. At the start things looked good.

img_20200202_161305When I got to the heel, usually my favorite part to knit, I tried a short row heel. Oh, it didn’t work. I followed the pattern, and watched a video or two on how to knit short rows, but it wasn’t coming together for me. So I ripped the heel out and started over, this time with my regular heel flap method. Then I realized as I started the gusset that I forgot to turn my heel – you know, make the little cradle for your heel. Rip out the heel again, only this time, I can’t get the stitches back on my needle right. Deep breath and rip the whole thing out.

img_20200215_153946
So I started over. I loved the pattern, loved the yarn and loved how the socks were looking, so I just went for it. I don’t know what happened, but I ended up starting over 6 times. There were issues with the cuff, issues with the number of stitches, issues with dropping stitches and issues with loosing my place in the pattern. But I persisted and I ended up – finally – with a complete sock . . . that was too small. I inadvertently went down both a size for the sock and a needle size. I had intended to do one or the other and somehow did both, so now I had a completed sock that I could not get on my foot.

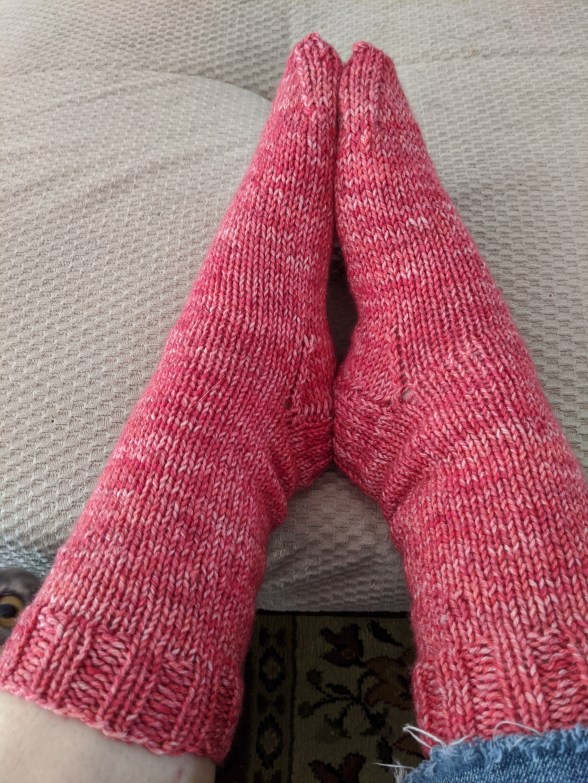
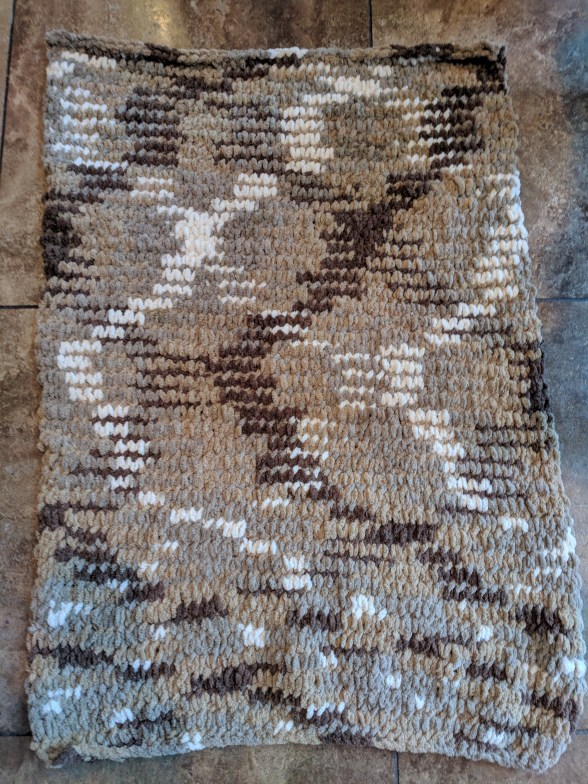
This is when I took a break. I just couldn’t do it again right away, so I went for the slipper socks as a nice diversion and to get my knitting mojo back. It worked and when I started again, I was in a much better place. I did end up starting over twice more, but in the end, they came out great and fit really well. They are put away for the time being (it is already 90 here). The lesson I’m taking from these is persistence pays off . . . and know when to step back for a little while to get perspective.

img_20200301_183911

Slipper-ish socks

At the end of January I cast on a pair of socks that seemed pretty straight forward. Two weeks in I began referring to those socks as the cursed socks. Progress was not going well and I was getting frustrated and feeling not so great about knitting in general, so I decided to take a break from those and knit myself a nice, warm, thick pair of slipper type socks.

I used the purple wool that we picked up in Scotland years ago. It’s thick, warm and knits up really neatly so I thought this would be perfect yarn for slippers. I made my first attempt at toe-up socks and tried a new type of heel. Sock one came together quickly and the heel actually worked for me. (Sweet tomato heel for those who knit socks.)

In short order, I had two pretty darn good looking, well fitting, warm and cozy socks. I was so happy to have a completed knit again and my knitting mojo back.

Once these were done I did go back to the cursed socks. This go around is a little better, but there are still issues I’m working out. Hopefully they will be done soon, but in the meantime, I’m going to enjoy my new socks.


Inadvertent Sock Monkey Socks

I’m still on the sock kick. These are the fourth pair I’ve made (I’ll post number 3 later – there is a story behind these) and I have to say, except for one incredible screw-up that wasn’t noticed until the socks were actually completed, these were fantastic!

When I asked Val what kind of socks she wanted, she said warm. Really warm. Thick and wooly warm. So I searched patterns, found lazy weekend socks. I made these in a yarn I had to test them and they came out pretty good. A few issues with the heel, and a little short, but overall not bad. I thought with the right yarn, they could be great for Val’s socks.

I looked through my stash of yarn and came across some yarn we bought in Edinburgh years ago. I loved the colors and thought they would make a great warm, wooly sock. And I was right – but the color of the brown yarn took on the sock monkey color when paired with the cream. Seriously – it didn’t look a thing like sock money brown in the cake, but knit it into a sock with some cream yarn and it really does. Once Bob said they looked like sock monkey, I couldn’t see anything else.

But no matter. Warm wooly socks can look like sock monkey. I followed the pattern exactly as I had done the first time, but I was able to make the heel correctly this time (I finally could tell what they meant in a particular part of the pattern) so I felt really, really good about these.

And then I finished and put them together. You see the problem, right? It’s not the size, or too many or too few rows or something that isn’t matching. Nope, I was extra careful with all of that. The heels are right, there are not any gaps. In fact, the socks are practically identical. And there in lies the problem. Somehow, I didn’t get the cable detail on the correct side of the second sock, so both cables are on the right side of the leg. Sigh. I literally noticed this after I completed the second sock, wove in all of the ends and put them next to each other. How I did this, I have no idea. But I did. So much for the perfect sock.

I’m taking this as a challenge, and a reason to make another pair of socks for Val. It may be a little bit (I have a list of socks to make already) but I will make them before the end of this year. A better pair. A perfect pair. A pair that doesn’t have a noticeable execution flaw. Challenge accepted!

But they are cute. Super cute.

Lazy Weekend Socks

My second attempt at socks and I have to admit – knitting socks is addictive.

Val asked for a pair of warm, wooly socks and I searched for good patterns. I came across this one with the cute cable design on the side and decided to try it. I made a pair for myself first (just in case there was something I had trouble with) and not only did they knit up quickly, they are super cute!

I love these. The cable came out great and they fit pretty perfectly. For Val’s I’m going to do a different yarn and am probably going to go with contrasting colors for the cuff, heel and toes. But for me – I love these and may kit a pair in the pretty blue yarn I picked up in California.

Socks!

I had a goal for the winter break – I wanted to learn to knit socks. This goal was planned back in the summer but I wanted some concentrated time, with no other projects, available before I started this. Socks seem complicated. Socks have to fit. Socks were going to require some trial and error and attention to detail. Did I mention that you have to make two and they need to be the same? Yep. This was my goal – learn to knit a pair of socks.

When we were in Sonoma, I stopped into a yarn store and asked about a good yarn to learn how to knit socks with. The very nice lady at the store suggested I start with a worsted weight. If you think about yarn, this is the weight you think about. It’s average, middle of the road, not heavy, but not light. Sock yarn is thinner, finer, more fiddly, so learning to knit socks on sock yarn might be a challenge. Okay. Yarn in hand and a pattern to look up, I was all set.

img_20191215_113936

Except. Except by the time December and break rolled around, I lost the pattern name she suggested. So I scoured Ravelry and found Cottage Socks. Not only are these for the right weight yarn and beginner friendly, they came with videos! Step by step video instruction. Perfect.

So I set out on my quest to learn to knit socks and promptly became frustrated. I’ve knit in the magic loop method before – I’ve made dozens of cat toys with it – but I just could not get it to work for the socks. Not one to give up, I searched the internet for answers. Double Pointed Needles were a popular choice, but those look hard. Two circular needles was one answer and there was the “don’t try this they are awful” 9 inch circular needle choice. Of course, that is the one I went with.

9 inch circular needles are tiny. Tip to tip they are – as the name implies – 9 inches. The actual needles are MUCH smaller than regular needles and every review I read said they are really hard to work with. But … they totally worked for me. No gap at the beginning of the round, easy to hold and, and for the flat parts and the toes … well, I just used a second regular needle. It worked.

In about a week, I had a new pair of wool socks. They fit, they look cute, Tigger approved, and they pretty much matched. I had one issue with the cuff (forgot to count rows when making the first one) but otherwise, they are great.

Socks are also addictive to knit. There are enough progress markers that give you the little dopamine hit that you just want to keep going (cuff done, leg done, heel done etc.). You have set places that you can stop and put the work down and pick up later. They are small, compact projects and best part – you get a new pair of socks when you are done.

So … if 2019 was the year of the sweater, 2020 will be there year of the sock! My goal is to knit one pair of socks per month (or more when I’m not working). Let’s see how it goes.

Happy knitting.


I Made a Sweater!!!

A while back I asked Val if she wanted me to knit her something. I was thinking a scarf, a throw blanket … you know, something easy. She asked for a lab sweater. I counter offered with a shawl as sweaters seemed hard and I wasn’t sure if I was ready for that or not. She said she would wait, was not in a rush, but would prefer a sweater. Sigh. Time to learn how to make a sweater.

I scoured my usual knitting sites and found a written pattern I could buy that had a video of the whole process. Hmm … possibilities. The level was “confident beginner” so I thought sure – I’ll give it a try. However, I did not want to make something for Val that I had never made before, so I decided to make one sweater for myself and if if turned out okay, I’d make another one for her.

Since this is knit flat – aka not in the round or connected – it seemed pretty doable. I was a little worried about blocking, fitting and sewing, but over a few months, I slowly knit up the sweater and then pieced it together.

I was pretty proud of myself when it was all done. It wasn’t perfect – I had some difficulty with seaming the sleeves to the body of the sweater, but I think it worked out okay. The big test was taking it on the road – California – and it was perfect! Comfortable and roomy, but not really bulky, it made the cool mornings much more pleasant, and the first day of the trip (top down driving up the coast in 50-something temperatures) not so bad.  And, I happen to think, it looks pretty good. Not bad for a first attempt at a sweater.

img_20190531_143020

Twisted Drop Stitch Infinity Scarf

I wanted to make myself a scarf, learn a new stitch and have a smaller project that I could travel with. The blanket that I’m (still) working on is really bulky and would not do well on a plane or in a car. I had this really pretty silk and bamboo yarn just lying around so I decided to try something new.

IMG_20181209_104933
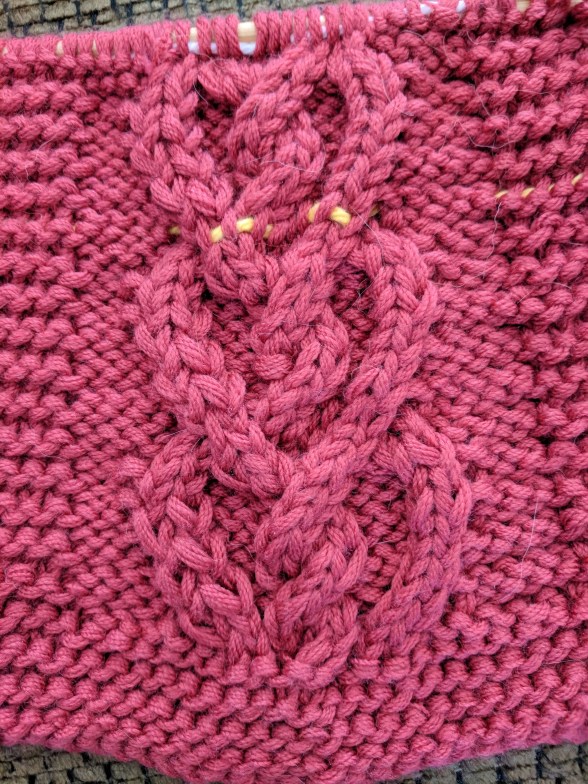
At first I tried this really pretty basic lace stitch with the two strands intertwined. I loved the effect, but I had a really hard time with remembering which row I was on (two-row repeat so that is important) and purling the thin, slick yarn. I really love the effect of this but the project was a little much for the easy project I wanted. So, I searched and came up with a different stitch to try – the twisted drop stitch. I can’t remember where I found the stitch, but I did and I loved it. It looked pretty easy and the scarf would not require a pattern per se, so … why not.

I decided to go back to the long tail cast on (something I don’t normally do because I horrible at estimating how long to make the yarn and always up with way too much or way to little) and just go with however may stitches I could – it turns out that one arm length of yarn for me was twenty stitches.

The basic idea of this stitch is that you wrap the yarn around your needles twice – once over both needles, then once over only the right needle – and knit as normal. This creates the elongated stitch of a drop stitch and the twisting effect. With the two strands of yarn, this came out to a really pretty pattern. I did one row of twisted drop, then two rows of regular knit stitch for the scarf and use as much yard as I had (two skeins of each color) then seamed the ends together. I probably could have done just one row of knit between the drop stitch rows, but I like the way this turned out. It has some weight to it and will be pretty warm, so who knows when I’ll get to wear it. 🙂


Tigger’s Blanket

In December I started knitting a blanket for the guest room – I want to replace the one we have and decided that I could knit one. This turned out to be larger project than I anticipated, but that’s not a bad thing. But I discovered two things – Tigger REALLY likes that yarn and it was too bulky to bring with me to knit in the car on the way to Suzanne’s for the holiday. So … Tigger gets his own blanket.

I picked up one skein of yarn – super bulky blanket yarn (Bob picked out the color) and started to knit on the drive up. 50 stitches across, one skein of yarn and a few days later Tigger has a blanket. It’s not fancy – a regular stockinette stitch so one side is nubbly and one side is smooth – but he likes it. I think because Tigger is getting older, he wants the soft and warm surfaces more. So … Tigger has a blanket.


Suzanne’s Scarf

Back when I was knitting Bob’s scarf for the DC trip, I sent a picture to Suzanne and she really liked it. So, for Christmas, I knit her a scarf. Not very creative, I know, but it is fun to try new stitches and if I can knit something that someone will like I want to give it a try. Like most things I make, they aren’t perfect, but I think they are perfect enough to be enjoyed.

IMG_20181113_194236I started out knitting the pattern I found on Studio Knit in my test yarn. I have a bulky weight yarn with a lot of stretch to try different stitches – it was on clearance (read cheap) and it works great for practicing stitches. I did some reading on cabling and gave it a go. The test came out great and it was actually pretty easy to do.

Since this worked well I decided I could knit the scarf in a reasonable amount of time and it would be great. Bob took me to a yarn store in St. Pete where I picked up some pretty, but thinner, yarn for the scarf. Knitting is knitting and the yarn shouldn’t make that much of a difference, right? I was so wrong.

Thinner yarn (worsted weight instead of bulky) and smaller needles mean smaller stitches, which actually makes the cabling harder – at least for me it did. I must have started, messed up greatly, pulled it apart and started over about six times in the course of one weekend. I was frustrated and ready to give up when I discovered lifelines (tip number 9). This made all the difference – if I messed up (and I did) I only needed to remove the stitches to the lifeline and could keep the majority of my work. The yellow thread running though the scarf – lifeline!

I kept at it over a few weeks and … I successfully cable knitted a scarf! I won’t mention how may times I cursed the pattern with that yarn or how many glasses of wine were consumed to ease the frustration (not as many as you would think, but definitely a few). But I discovered that I could do it, and the results are pretty nice. Persistence pays off sometimes and knitting seems to be one of them. I’m not sure I’m ready to cable again any time soon, but I know I will someday.

I have a few more projects in the works – a blanket for the guest room, an infinity scarf or two that look really sweet, a sweater for Val, and maybe a few cat blankets (I did knit one for Tigger over Christmas, so that post will be up soon) to donate to the local rescue. Yarn is super on sale right now so I’ve stocked up and hope to work on one large (blanket /sweater) project and maybe one small project (scarf/cat blanket/toy) at a time.

Keetna’s Blanket (with an ode to Rosie)

There are only a few times when I get super excited about something I’ve made, be it a paper/project for school or work, a meal or a knitting project, but this was one of those times. After knitting Bob’s scarf and a cat blanket or two for home, I decided to make one for Keet – Ed & Erin’s cat. I wasn’t exactly sure what I was going to do, but I started with black yarn and a cat pattern in honor of Rosie – the cat they adopted at the same time I adopted the original three kittens. After thinking (and knitting) a bit, I decided to change up my original plan, and I think it came out pretty great.

Each of the four corners are grey paw prints, and all the other squares are a cat pattern. I knitted each column together so I only had to join the column together. Unfortunately, I miscalculated and knitted one middle square too large (added probably 2 rows), so I had to figure out how to separate it from the square above (remember they were knitted together), then remove the two rows and stitch it back together before joining it to the rest of the blanket. I’m not sure how I pulled it off, but I did and the result was pretty good.

I finished this a before Thanksgiving, but I wanted to wait to post it until I gave it to Ed and Erin (and Keet). It definitely kept me busy for a bit, but I like how it turned out and it gave me a little more confidence – so much so that I’m now knitting a blanket for the spare room. This may take a few months, but I’m pretty sure I can do it.